Image and video editing
Make image versions, assemble clips, generate and style captions, and export a finished video.
On this page
Use the image editor for a new edited image version. Use the video editor for a saved project built from clips. Keep the original output available so you can compare the edit.
Edit an image
Open an image in the editor or choose Add image. Studio edits Library images; an arbitrary external URL is rejected with “Choose an image from your Studio Library.”
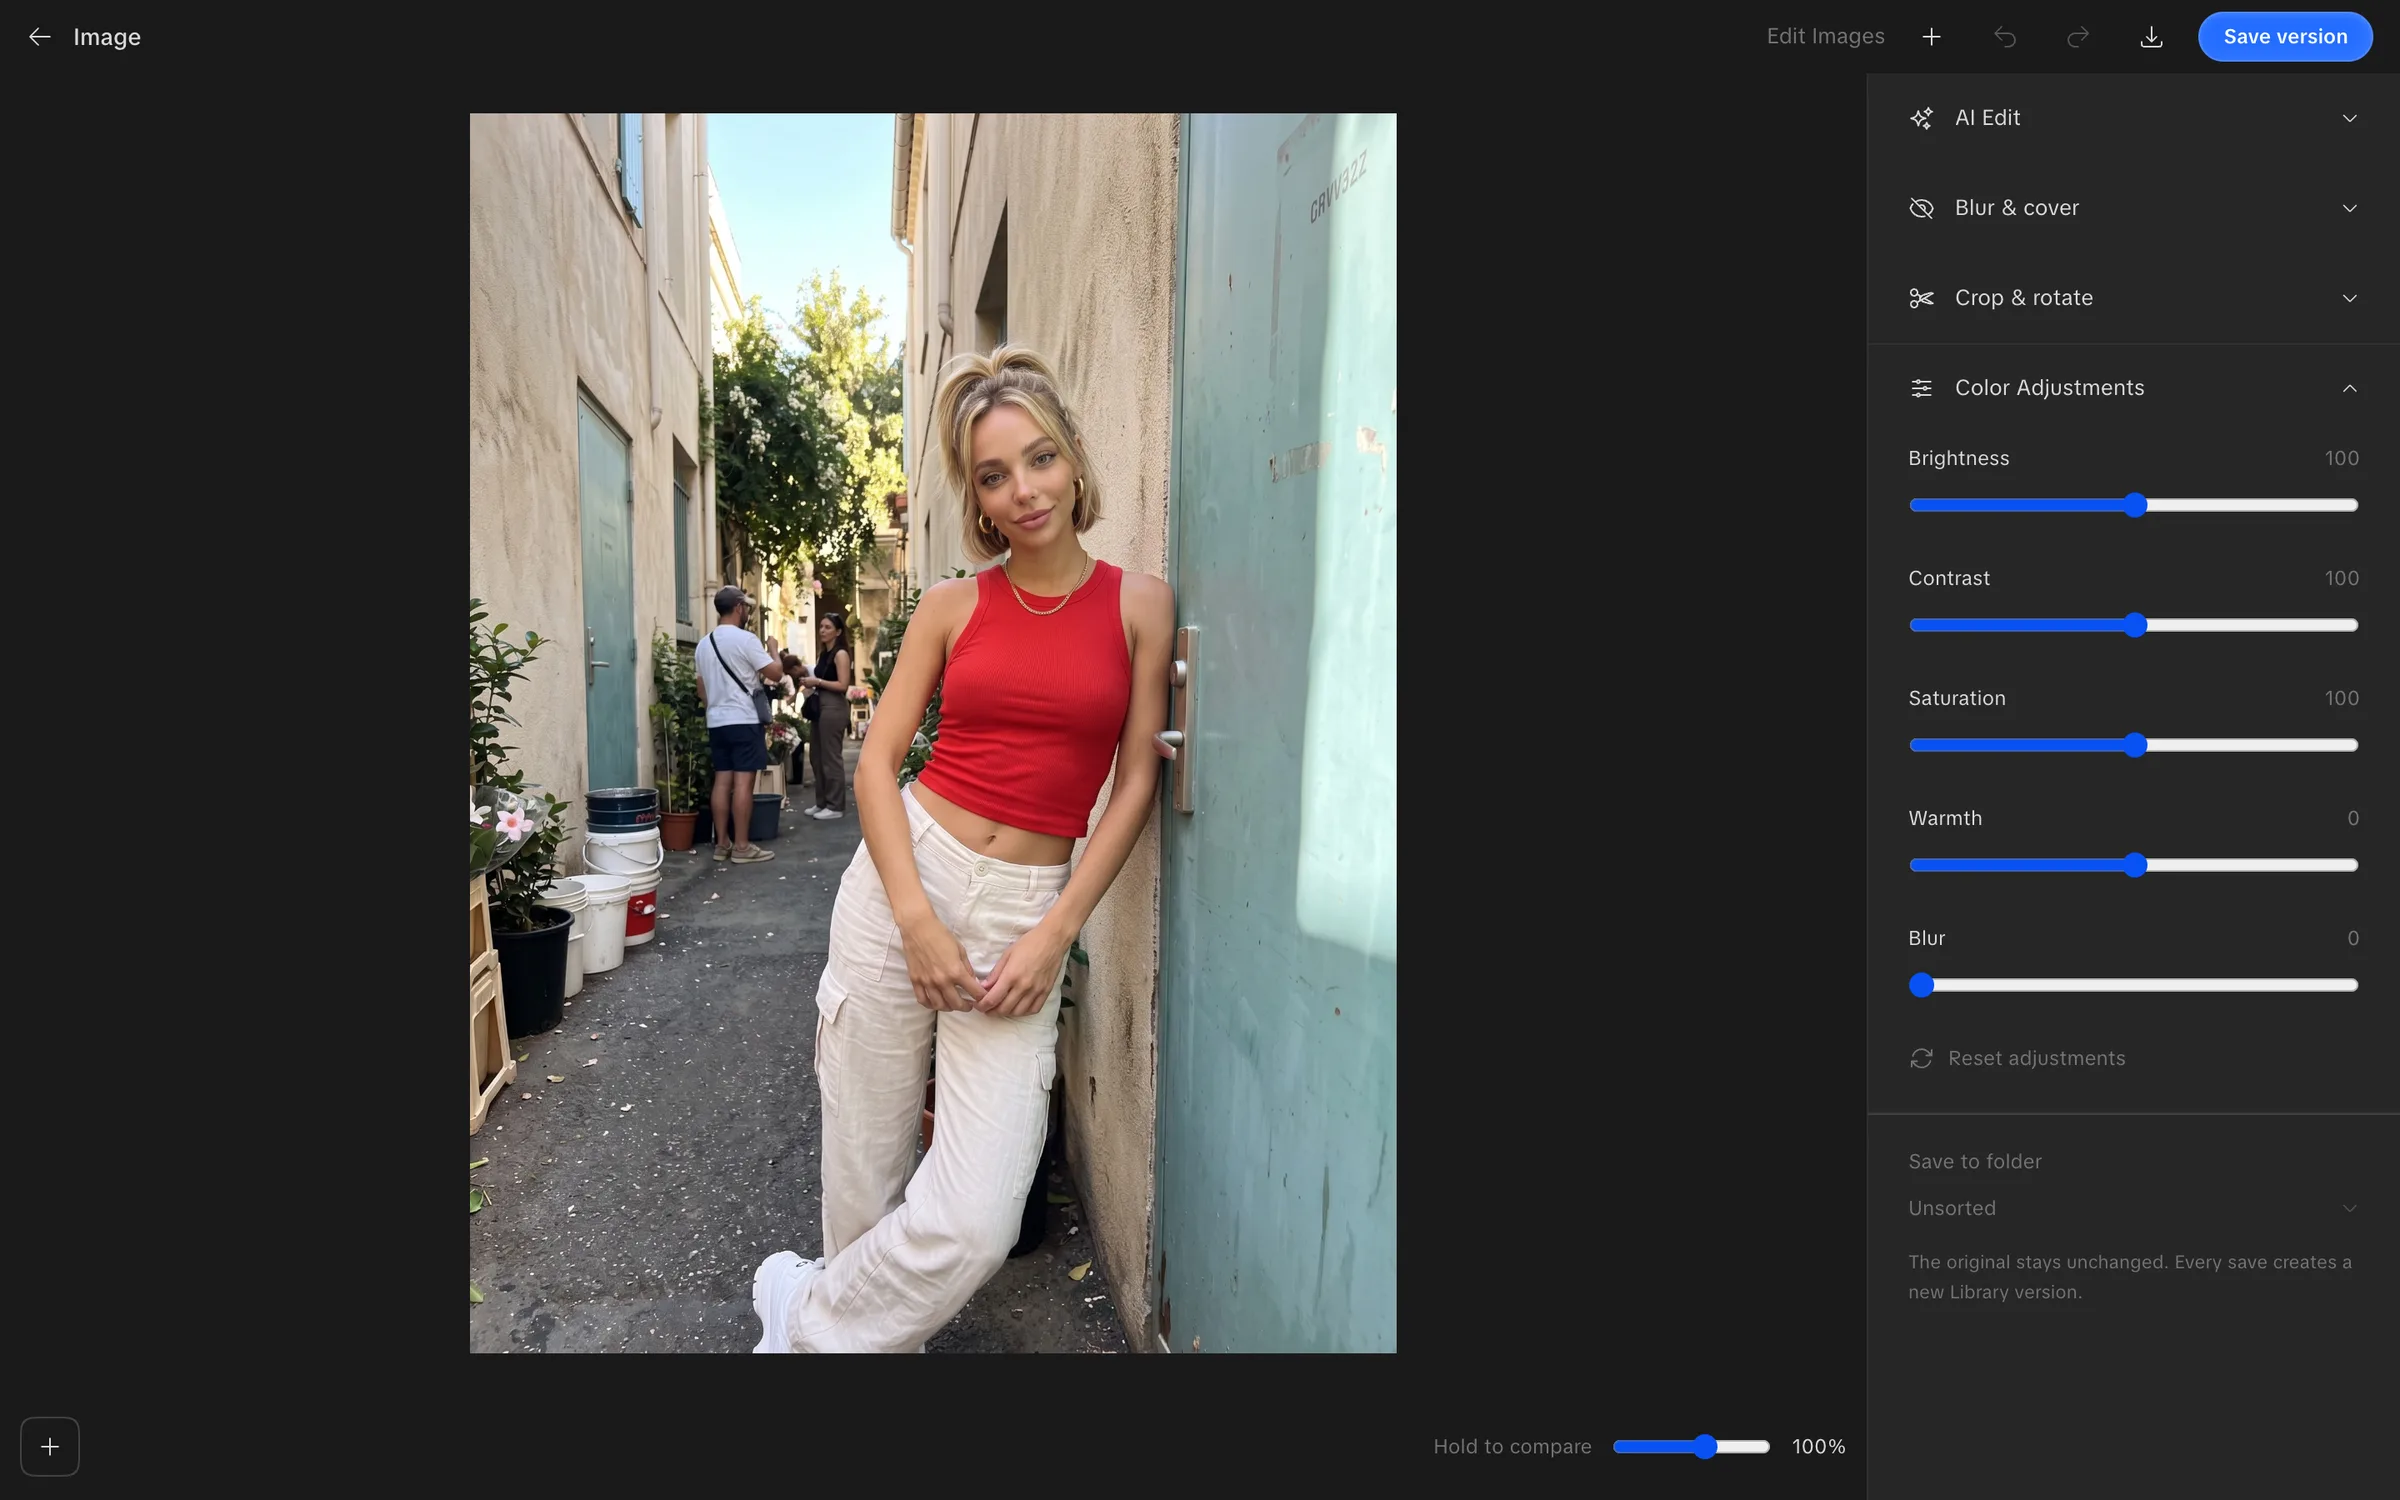
Color Adjustments includes brightness, contrast, saturation, warmth and blur. Reset adjustments returns those controls to their defaults.
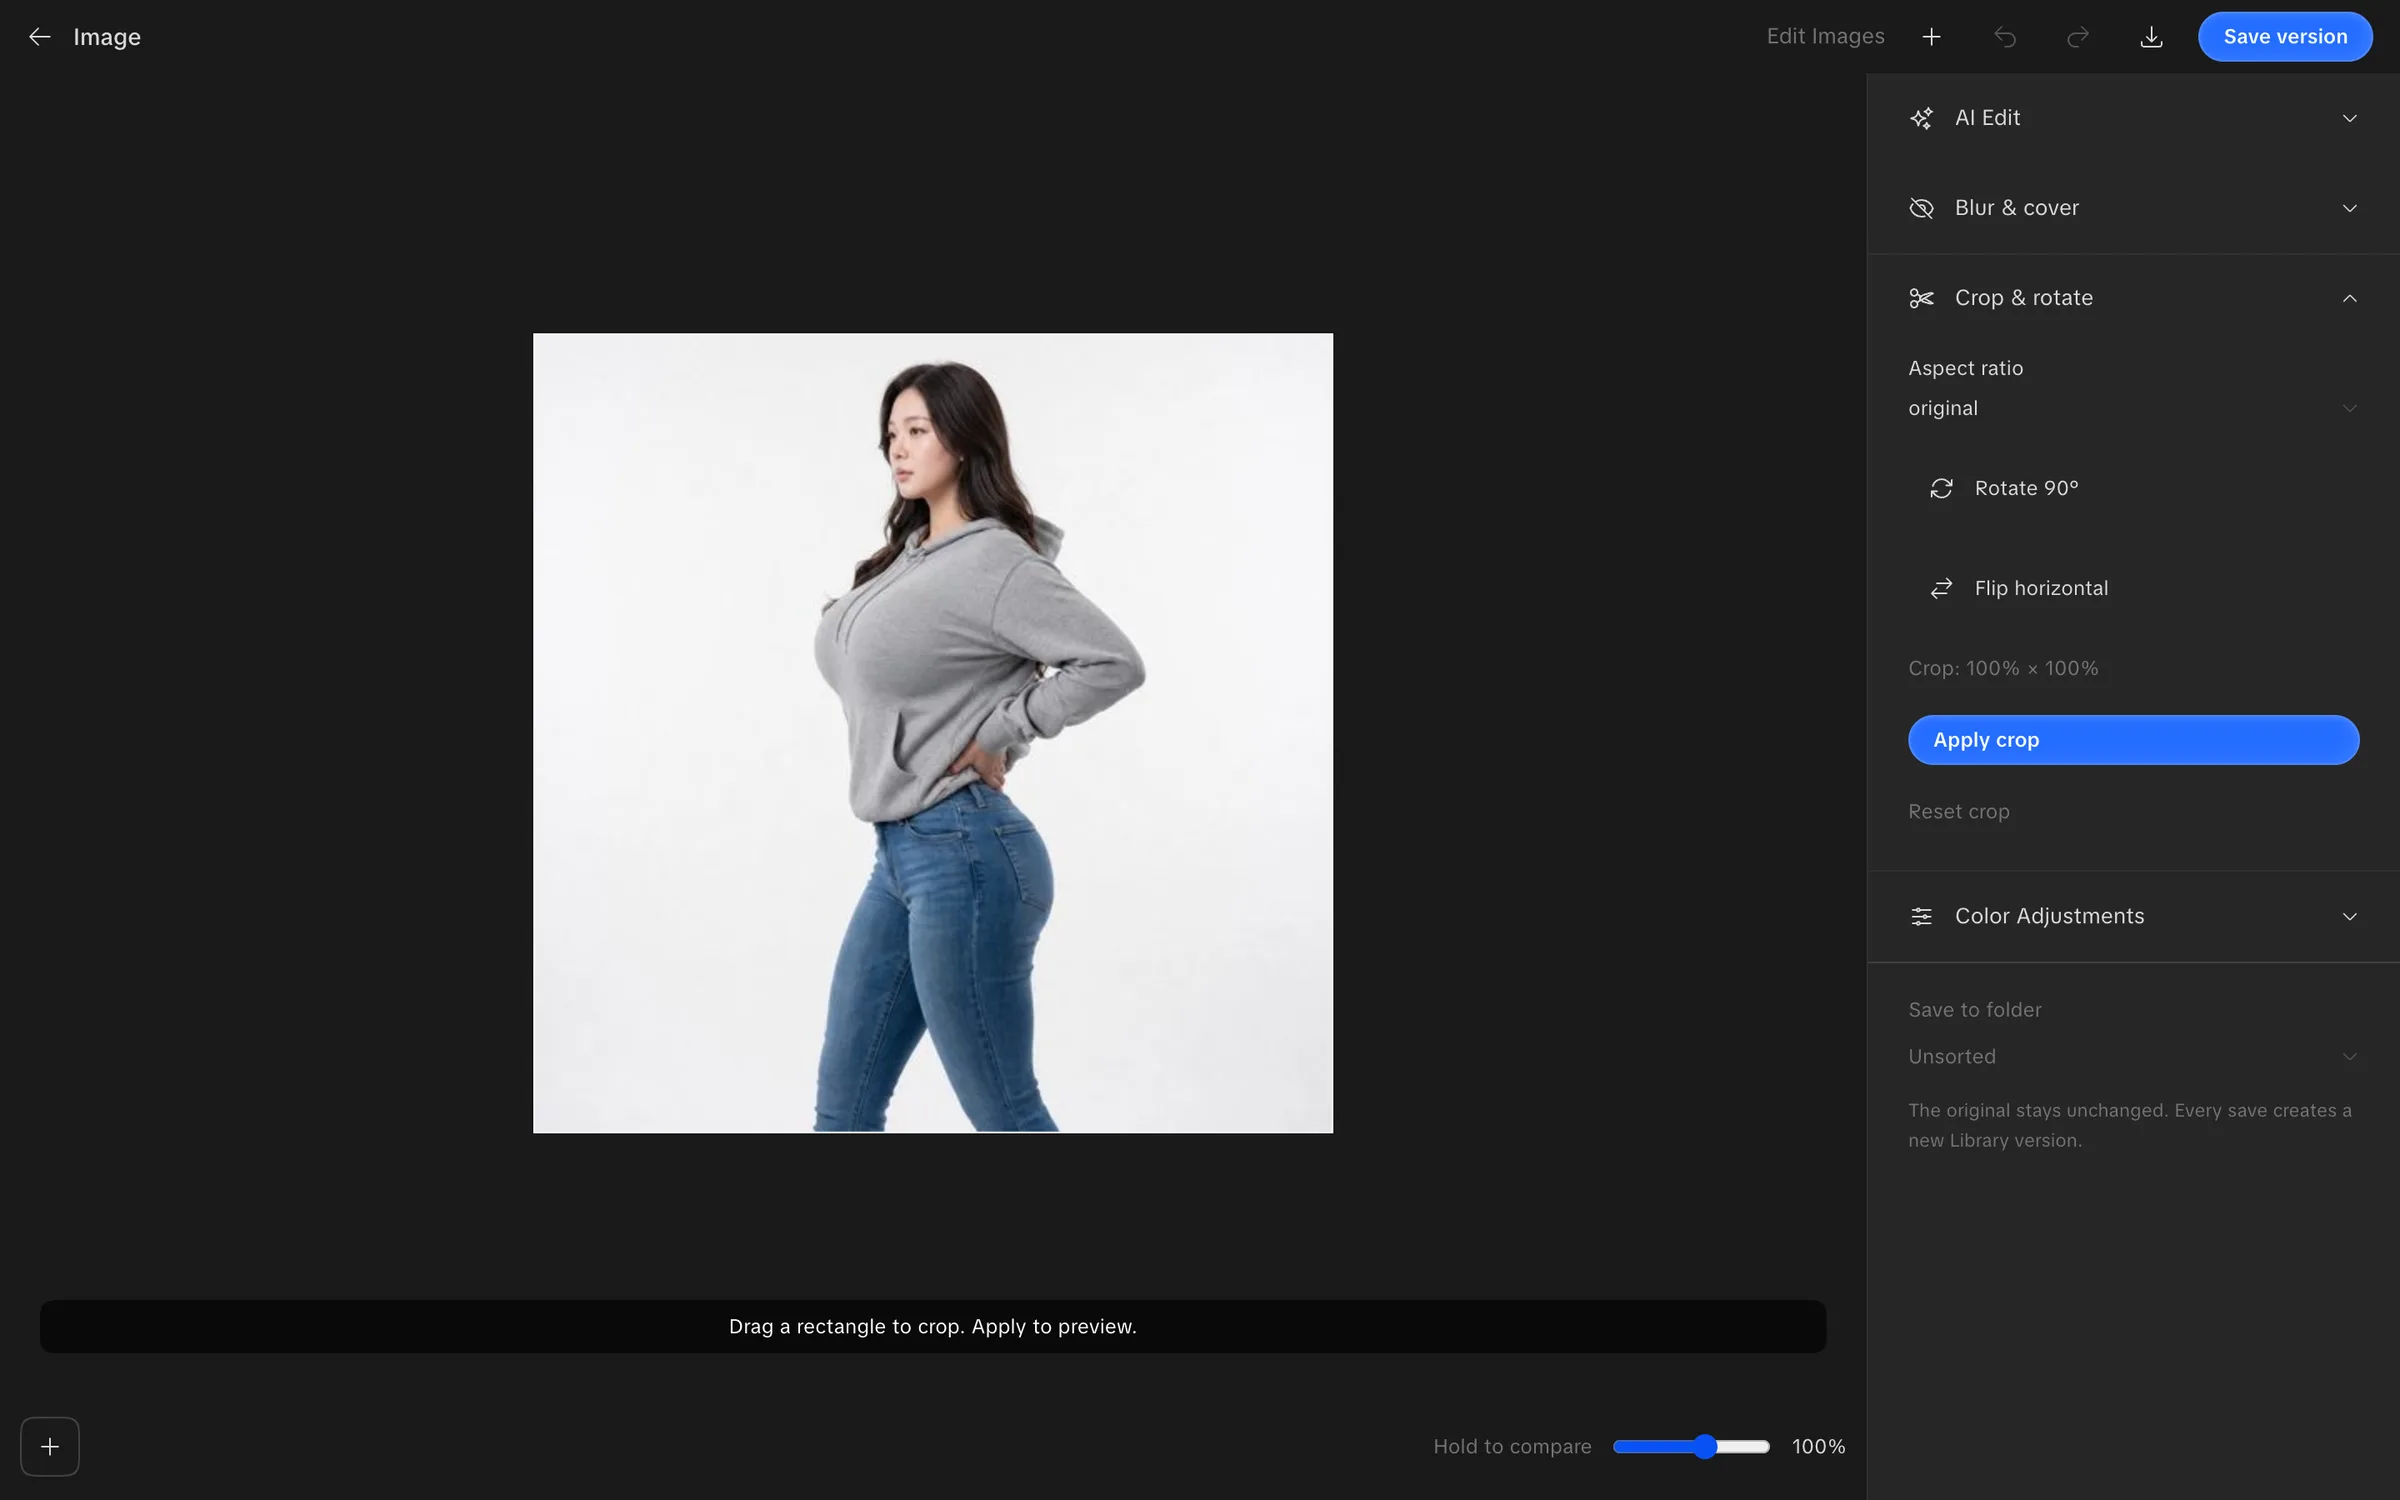
Crop & rotate offers the original ratio, 1:1, 3:4, 4:5, 9:16 and 16:9. Set the crop, then choose Apply crop. Rotate 90°, Flip horizontal and Reset crop change or reset the geometry.
Mask tools provide Solid cover and Soft blur regions. Draw a region over the area you want to cover, remove an individual region or choose Clear regions. Check the region after a crop or rotation.
Use Undo and Redo while editing. Save to folder chooses the destination; Save version writes a new Library upload. Studio confirms “New version saved to Library”. Download image downloads a PNG.
The AI editing composer uses the edited base image as its first attachment and the edit base, with further attachments treated as scene references. It starts with Ideogram 4.5 Edit and a count of one. Submitting an AI edit is a new generation; local crop and color changes are separate from that request.
Assemble a video
Open Video editor. Choose a recent project from the project switcher, or start a project and add clips from the Library or an upload.
Select a clip in the timeline to adjust it. Volume, Fade in (s) and Fade out (s) control the audio. If the asset has more than one track, choose Audio track.
Framing offers Fit and Fill. Fill can crop the source; use the horizontal and vertical reframe controls to keep the subject visible. Settings changes the project aspect ratio. The frame rate is set when the project is created.
Continue this clip generates a paid extension. Review its settings before starting it; it is separate from rearranging an existing clip.
Add text and style captions
Open Text and choose Add text. Select the text in the timeline or preview to edit it, and drag it in the preview to reposition it. The text field accepts up to 400 characters.
The style inspector controls the look, font, color, alignment, placement and animation. You can save a style to reuse it in the project.
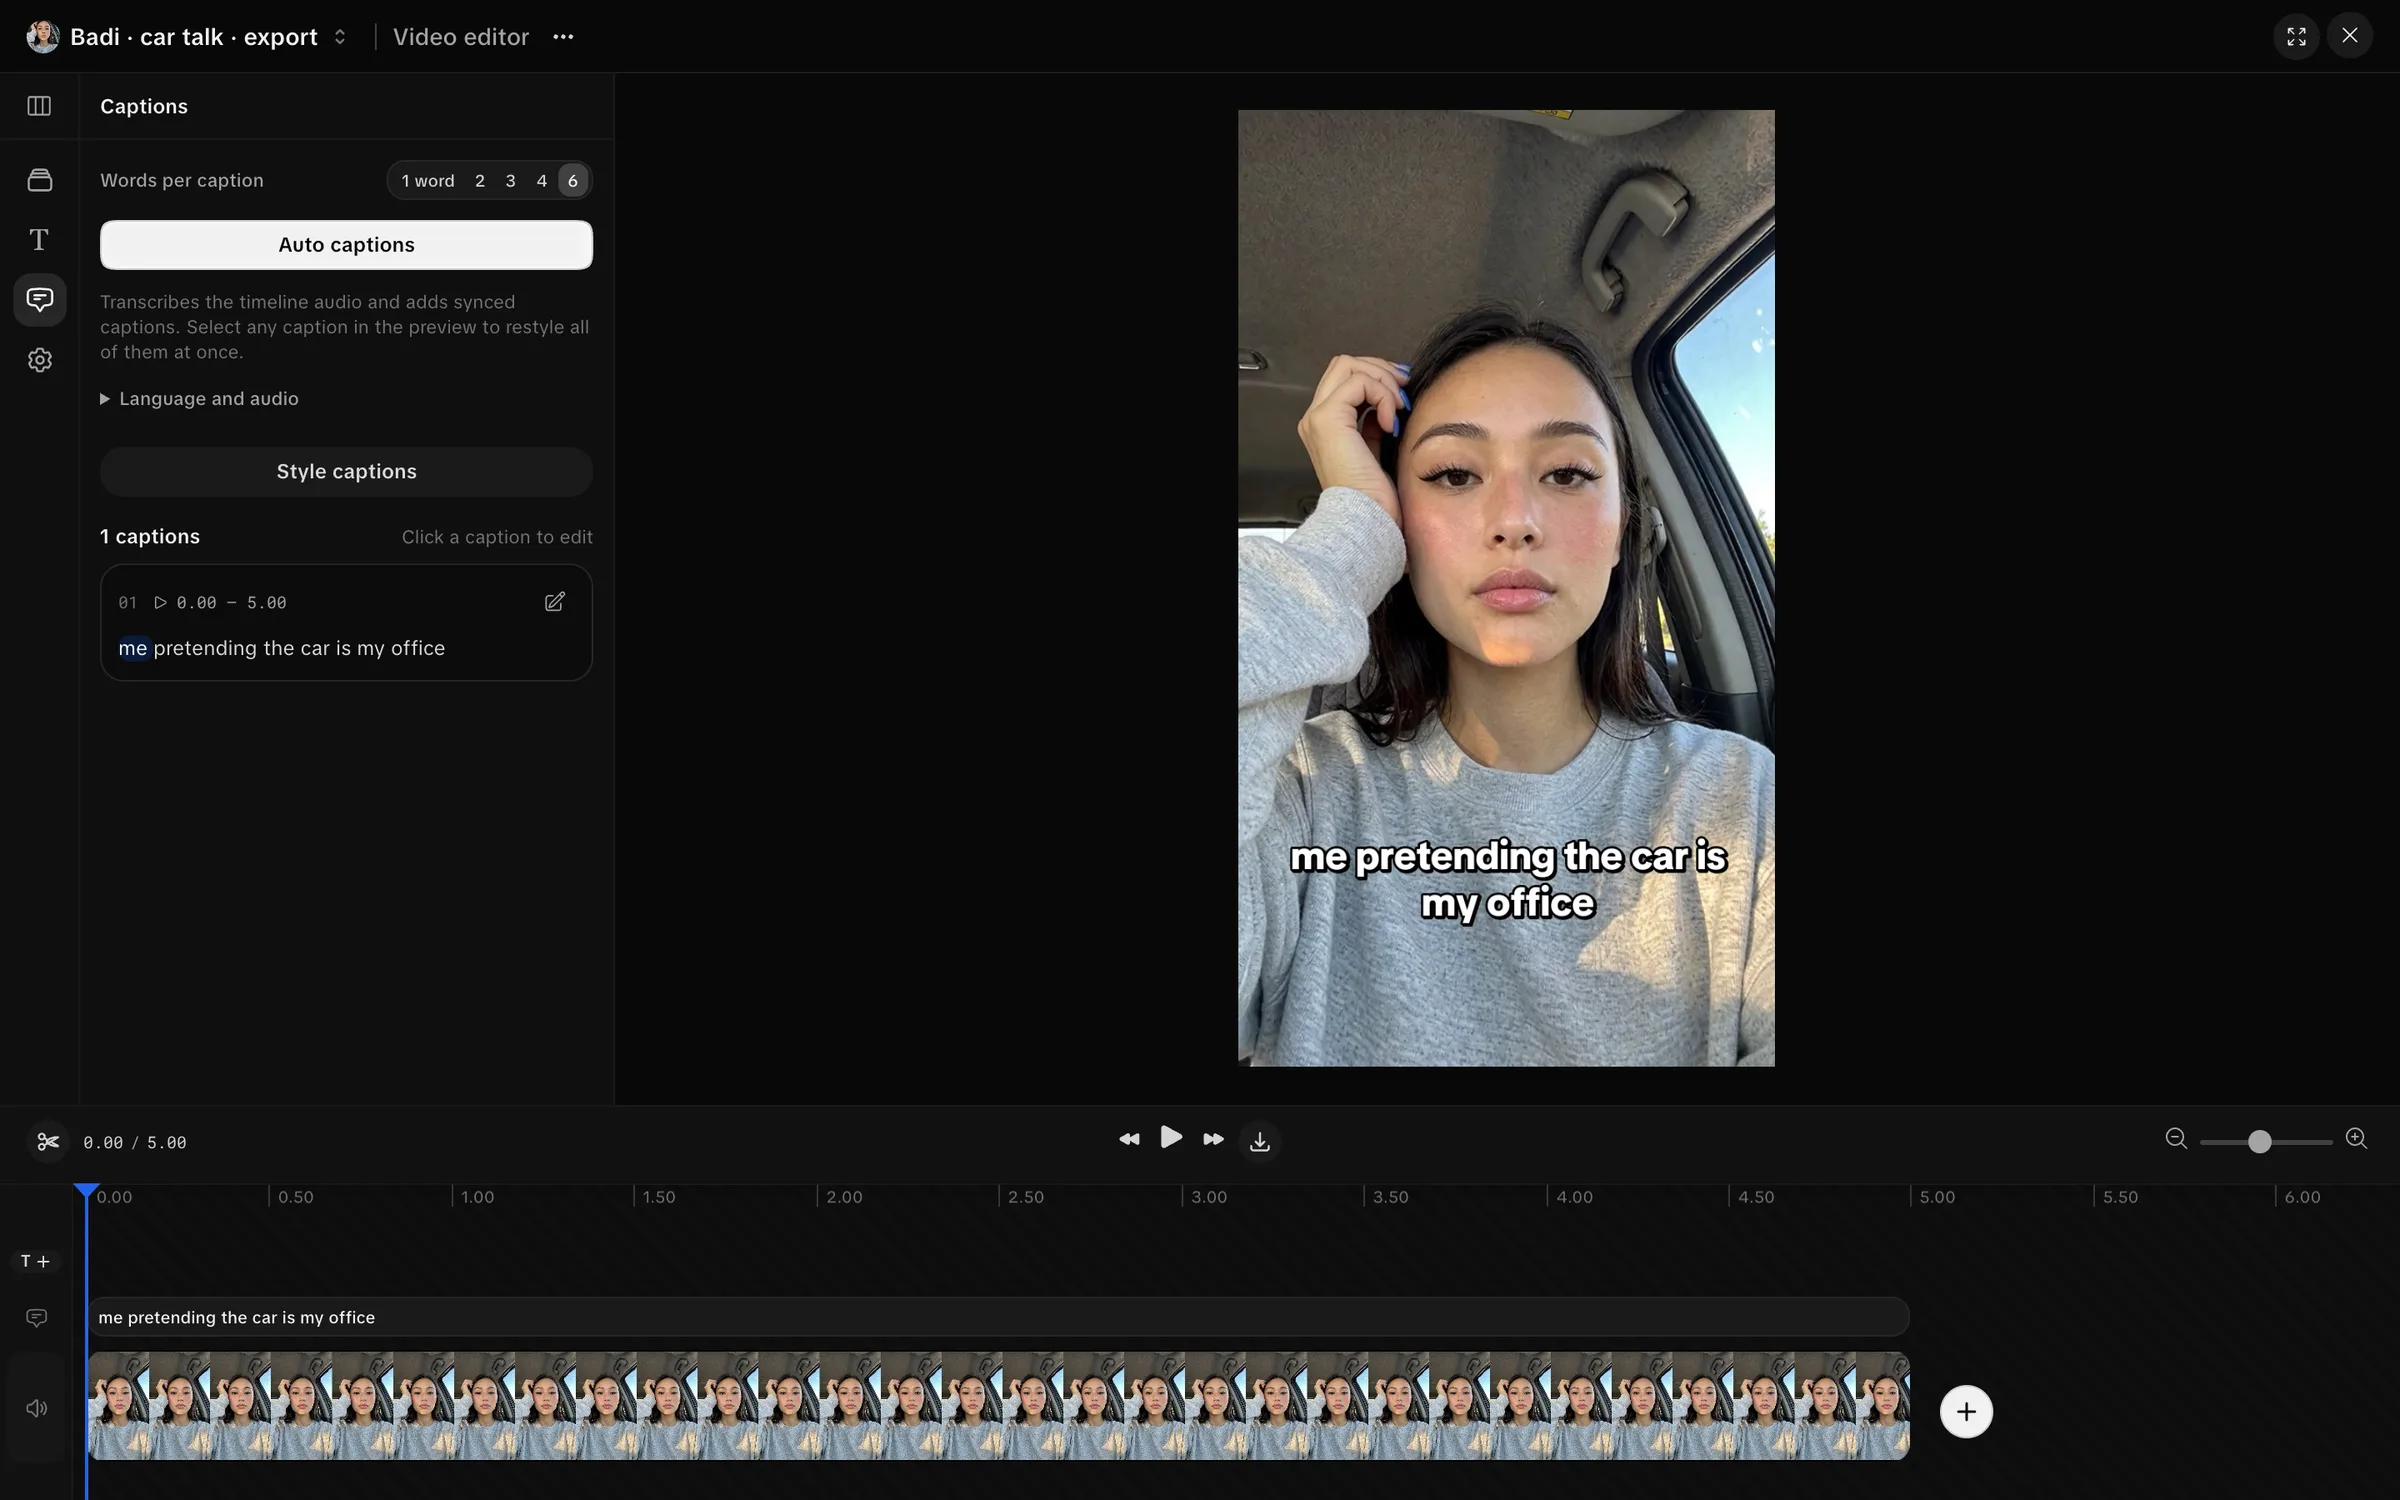
Choose Captions, then Auto captions to transcribe timeline audio when transcription is enabled on your server. Review the returned text and timing. See Auto captions for language, audio classification, corrections and alignment.
For existing captions, choose Captions. Words per caption offers 1, 2, 3, 4 or 6. Select a caption or open Style captions to change the shared caption style. The change applies to every caption.
Use the preview to inspect where text sits over the image and whether it stays readable. Word-level effects need actual word timing; a sentence-level caption alone cannot provide it.
Export the project
Open Project actions → Export. Export Project shows the settings that will be rendered.
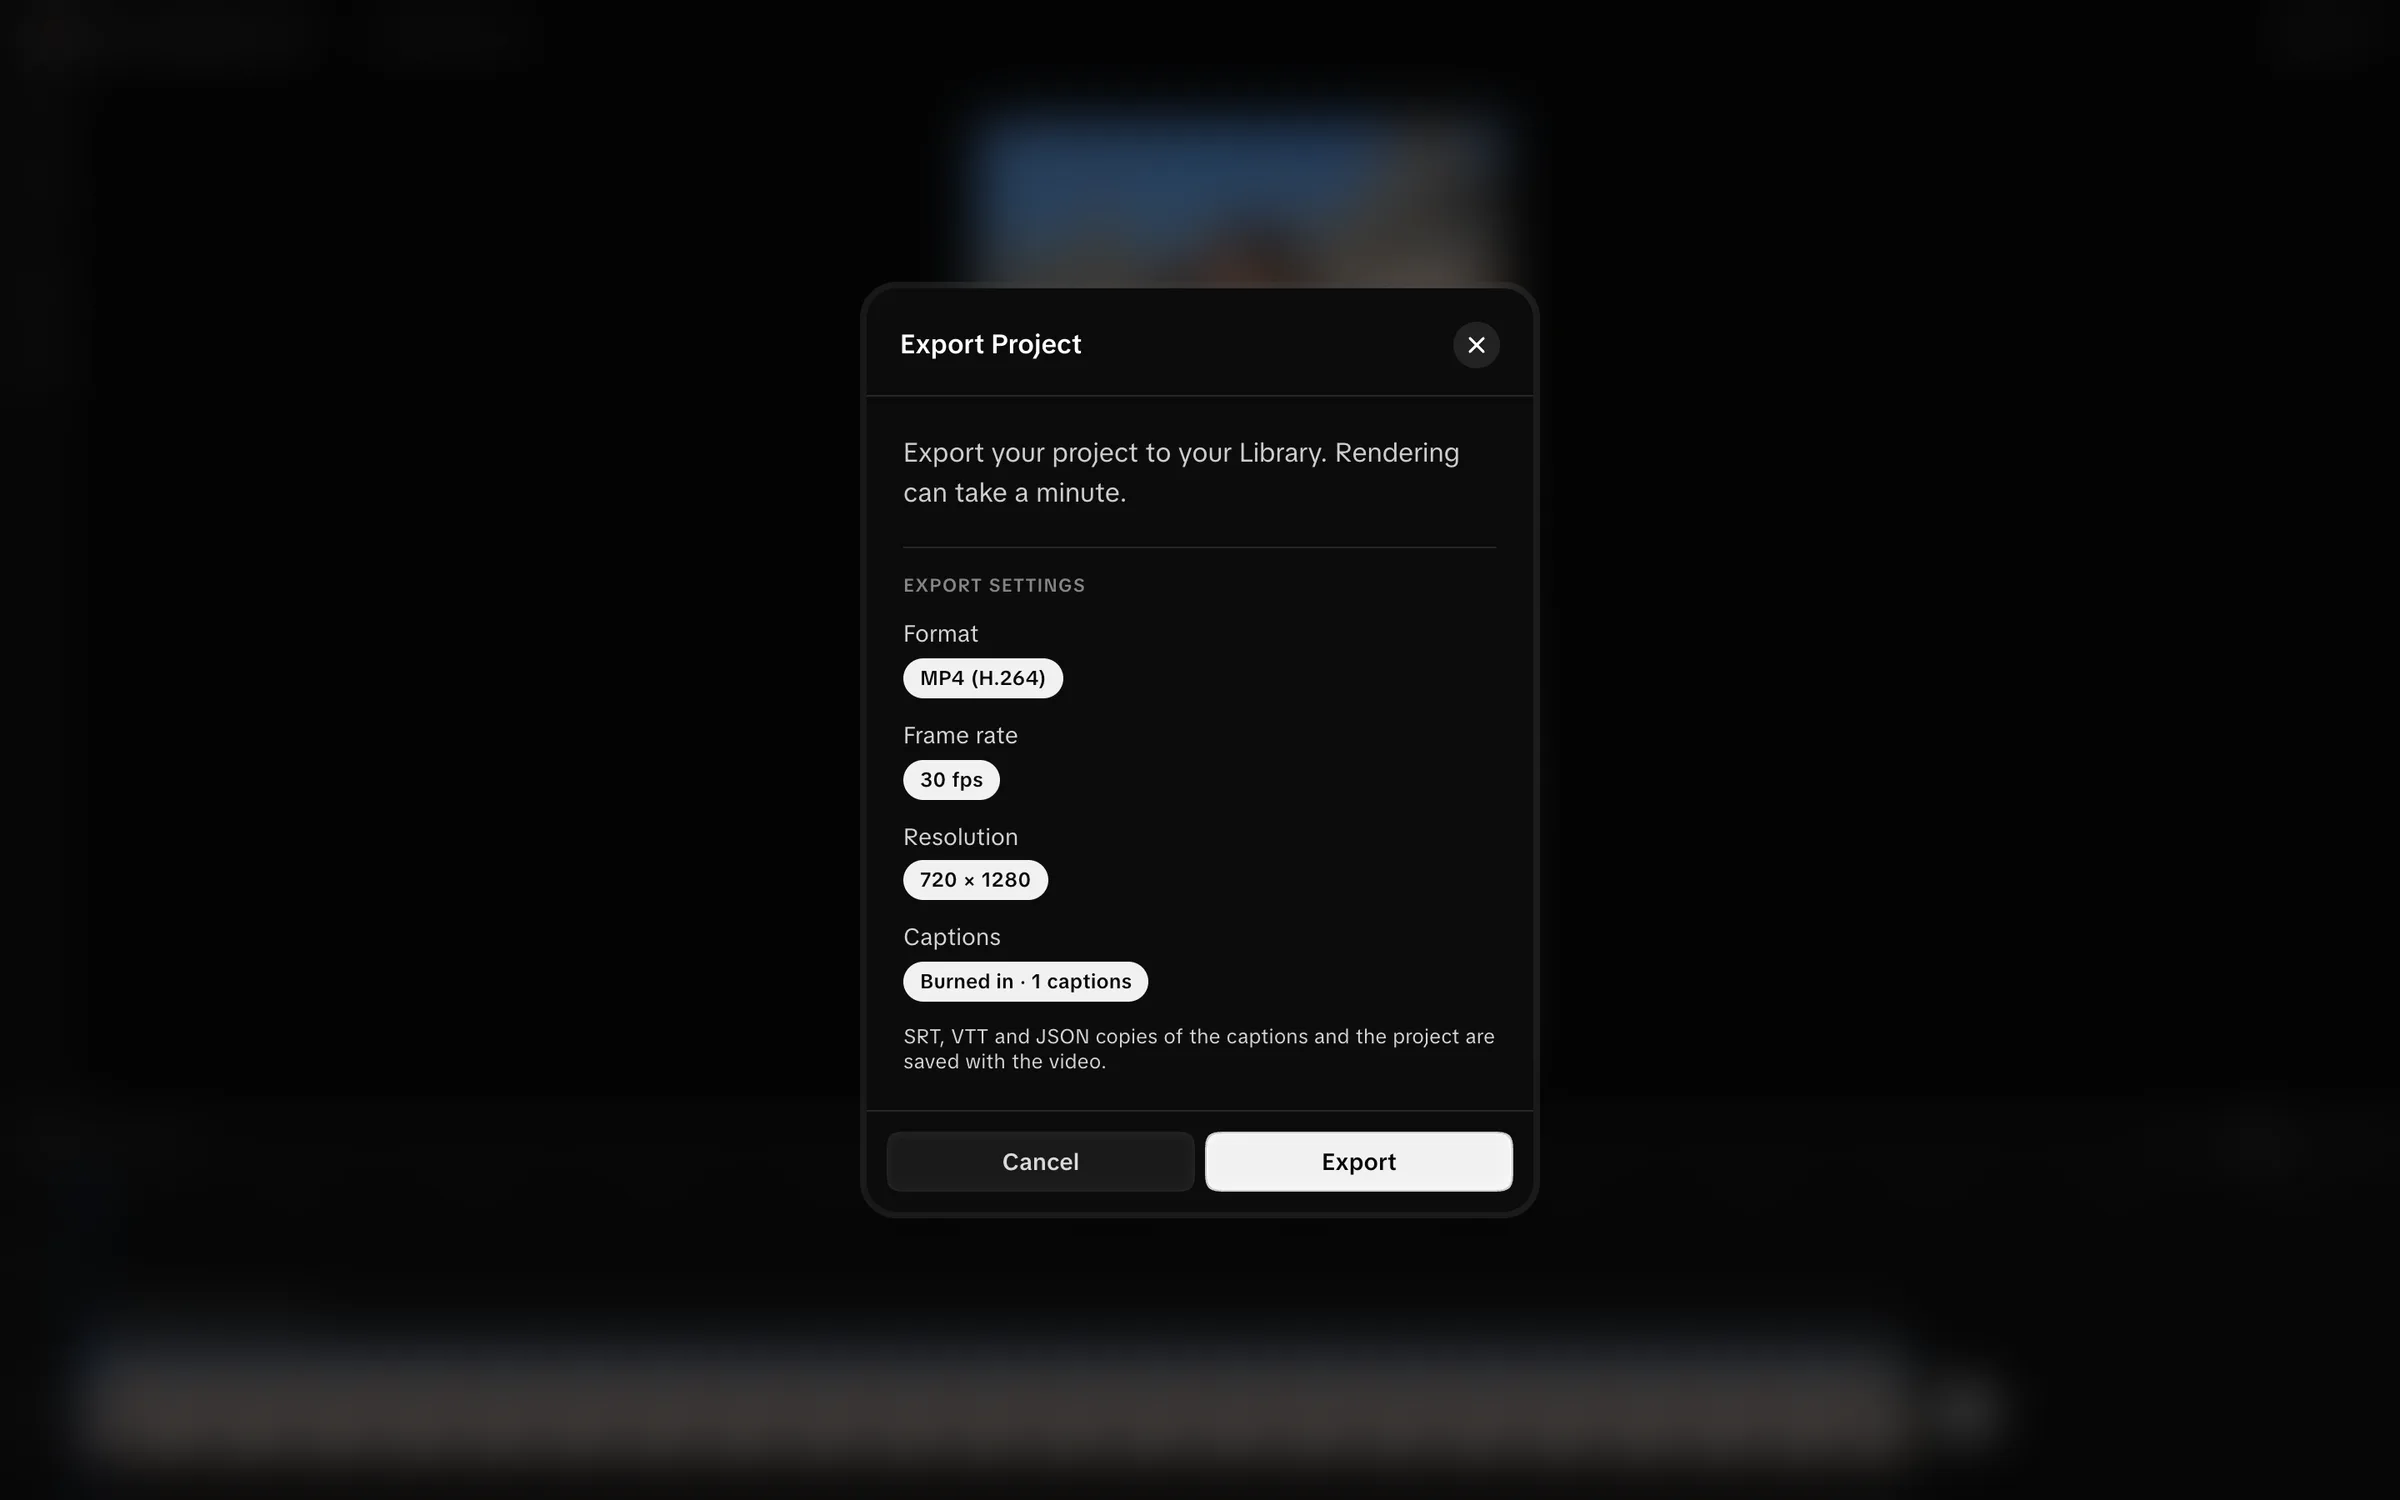
The export is MP4 (H.264). The project aspect determines the size: portrait 720 × 1280, landscape 1280 × 720, or square 720 × 720. Existing captions are burned into the video. SRT, VTT, caption JSON and project JSON copies are saved with it.
Choose Export and wait for Ready in your Library. The dialog shows queued, rendering, cancelled or failed states. Cancel stops a queued or running export. Open in Library finds the finished video; Send to Google Drive is available with a connected Drive destination.
Timeline keyboard controls
These shortcuts apply when you are not typing in a field or using a dialog.
| Key | Action |
|---|---|
| Space | Play or pause. |
| B | Toggle cut mode. |
| S | Split at the playhead. |
| Delete or Backspace | Remove the selected item. |
| Left or Right | Step the playhead. |
| Alt + Left or Right | Step one frame. |
| Ctrl or Cmd + Z | Undo. |
| Ctrl or Cmd + Shift + Z | Redo. |
| Ctrl or Cmd + S | Save. |
| Escape | Leave cut mode or clear the selection. |