Getting started
Join your invited workspace, set your preferences and make your first useful image.
On this page
You need a Clout sign-in and an invitation to Studio. Open app.cloutlabs.co/studio in your browser. Your agency’s invitation determines the workspace you join and your role in it.
Join the workspace
- Open the invitation you received.
- Choose Sign in with Clout if you are asked to sign in.
- Join the workspace named on the invitation screen.
- Check the active workspace under Account → Workspace before you add content.
If Studio says You're signed in and asks for an invite, your sign-in has succeeded but you have not been admitted to Studio. Paste the invitation into the field and choose Open invite. Signing in alone does not grant access.
A viewer can browse the workspace but cannot create or change content. If you need to generate, ask an owner or admin to check your role.
Follow the first-run setup
Your first visit can open Welcome to Clout Studio. Choose how you work and what you want to make, then move through Your workspace, Your first creator, Learn from what works, Where content goes and Make something.
The flow links you to Creator setup, Explore, Drive and the creation tools. Later lets you defer a step, and Skip setup returns to Home. Home’s checklist uses actual workspace progress, so skipping setup does not create a Creator or finish a connection.
Prepare your first Creator
Have a clear front-facing face photo and a full-body photo ready. Avoid filtered photos that change the features you want Studio to preserve.
- Open Creators, then start a new Creator.
- Enter Creator name.
- Drop, paste or click to select the Face photo and Body photo.
- Choose Create creator.
- Open References, inspect the prepared images and approve them when they match the Creator.
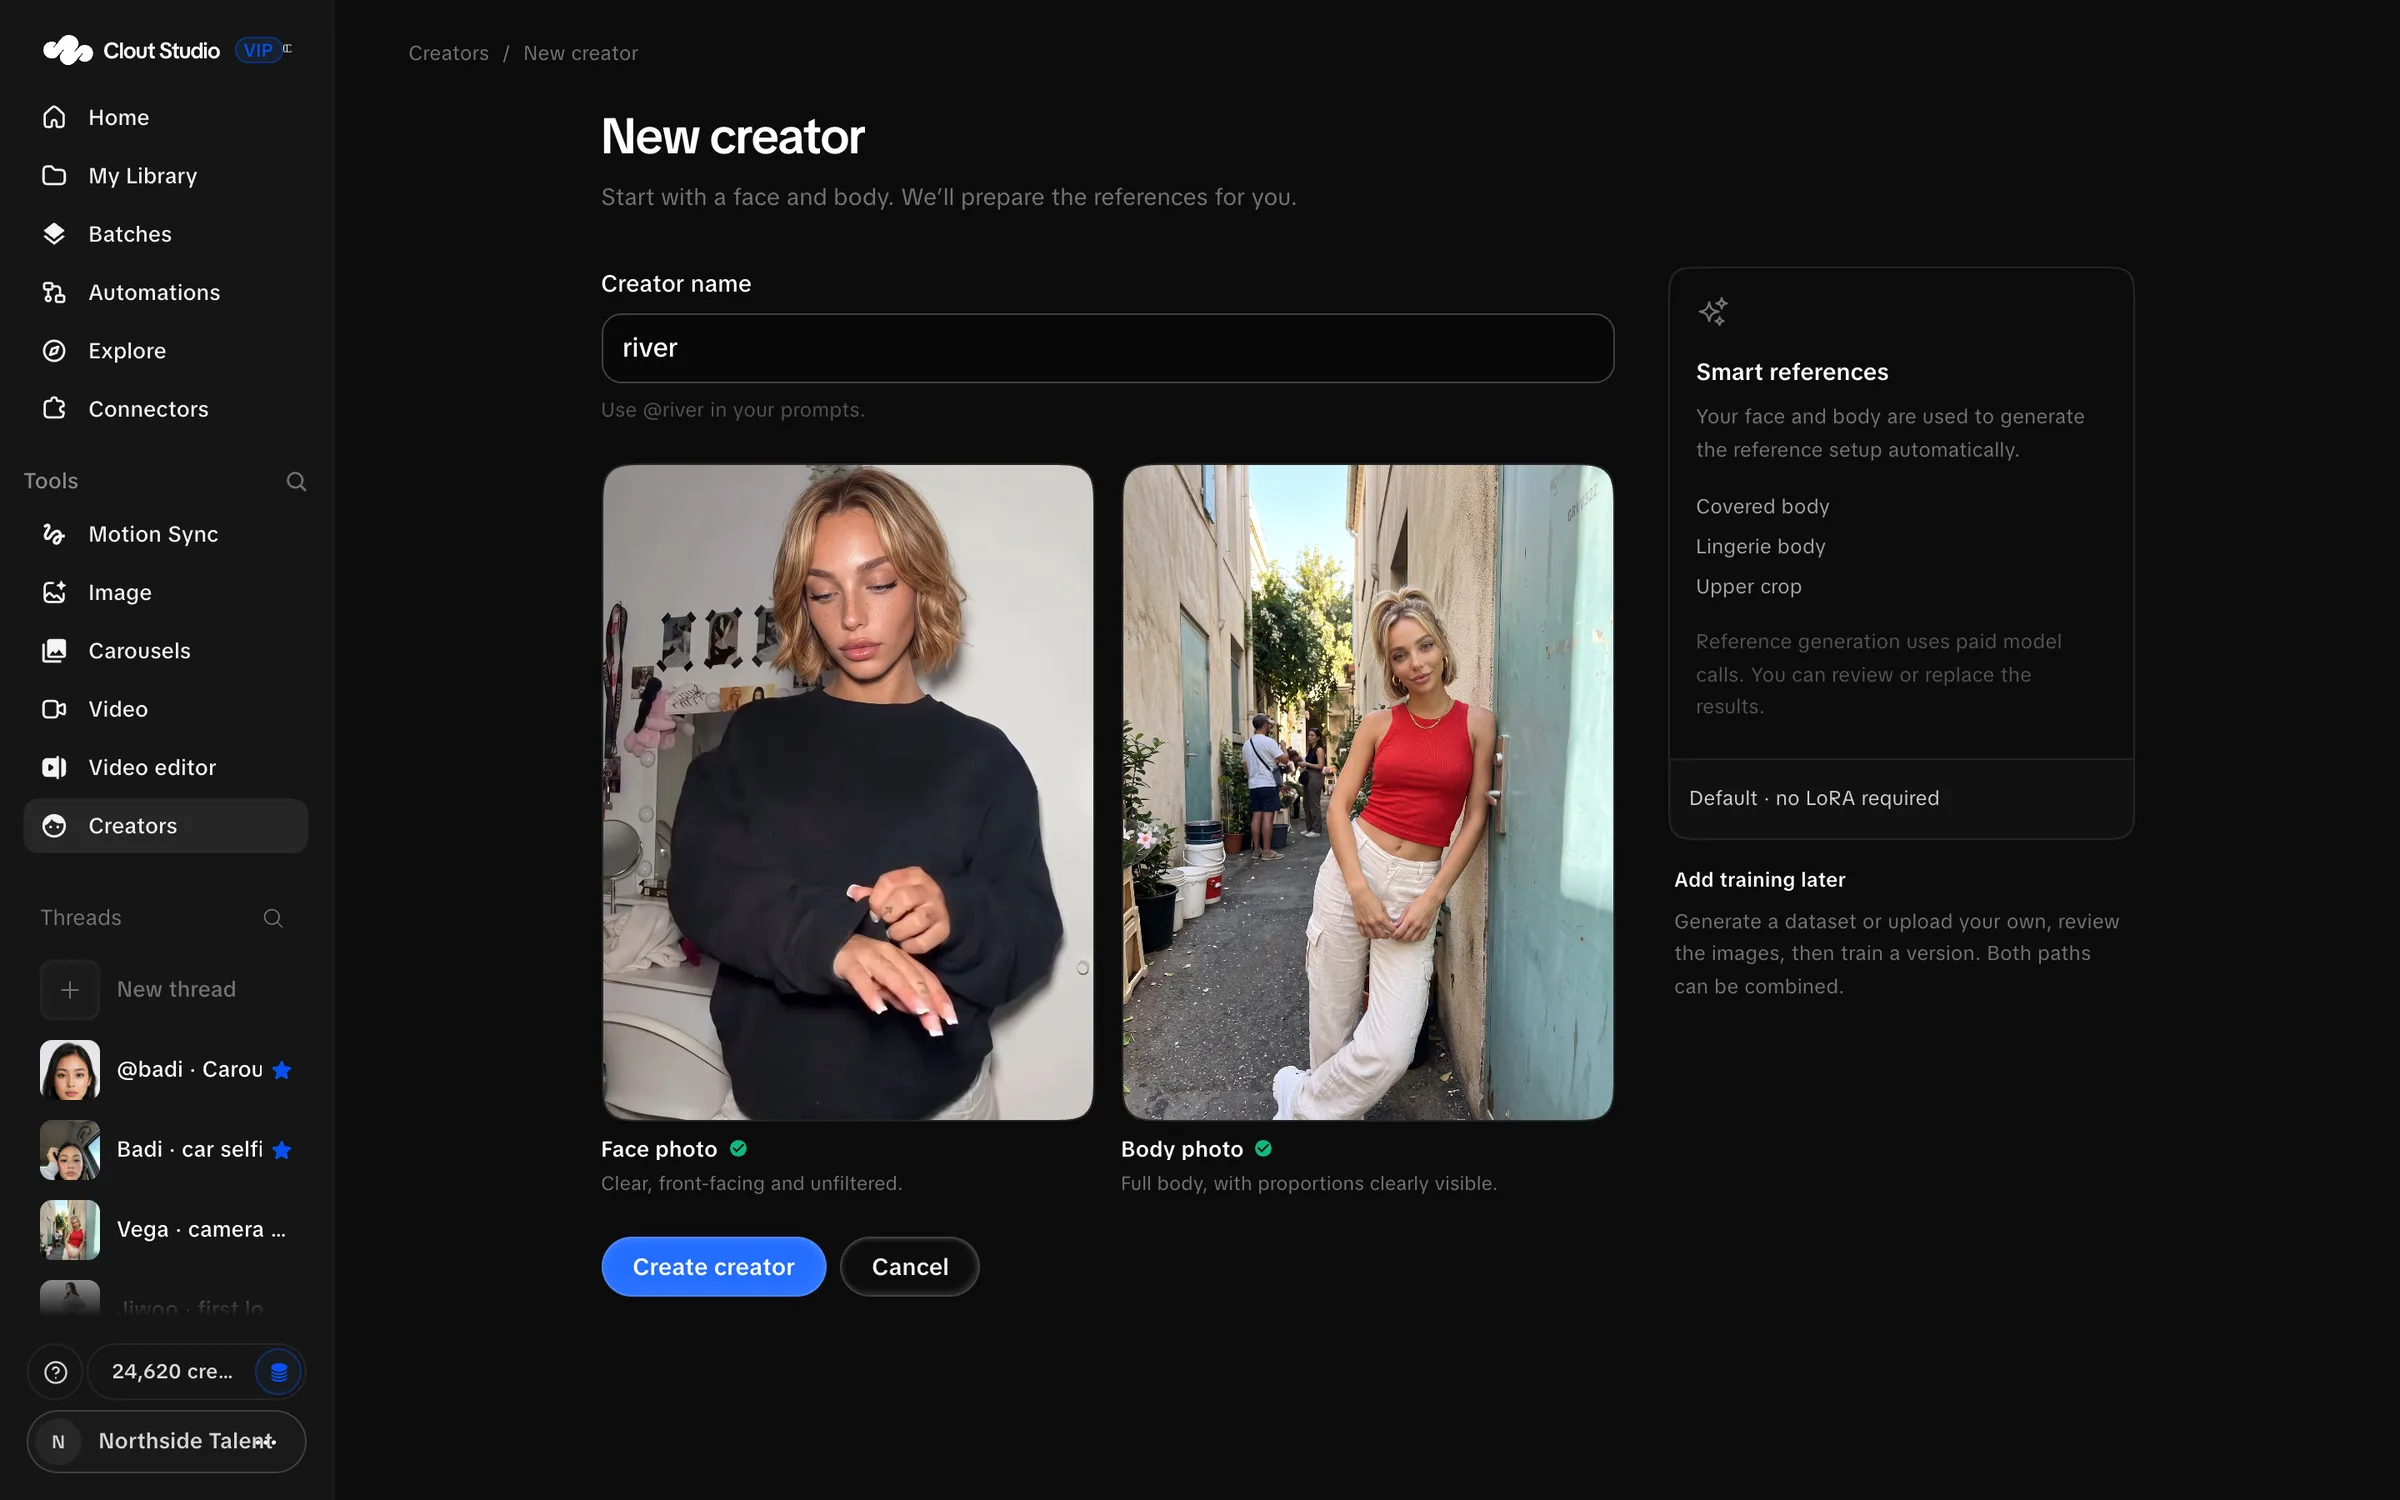
Creating a Creator starts reference setup. It does not automatically train a LoRA. You can generate using references before you train.
Make the first image
- Open Image.
- Type
@in the composer and select your Creator. - Leave the Creator on References · no LoRA.
- Write a specific scene: outfit, location, framing, light and what the Creator is doing.
- Select an image model that accepts Creator references, a format and a count.
- Review the estimate and use the composer’s submit button.
- Open the resulting thread or My Library to review the images.
For a first comparison, use a small count and one model. Increasing the count across several selected models multiplies the number of outputs and the work you queue.
Choose your display preferences
Open Account → Preferences. Light, Dark and System control appearance. The font choices are TikTok Sans and Google Sans; corner choices are Default and Soft.
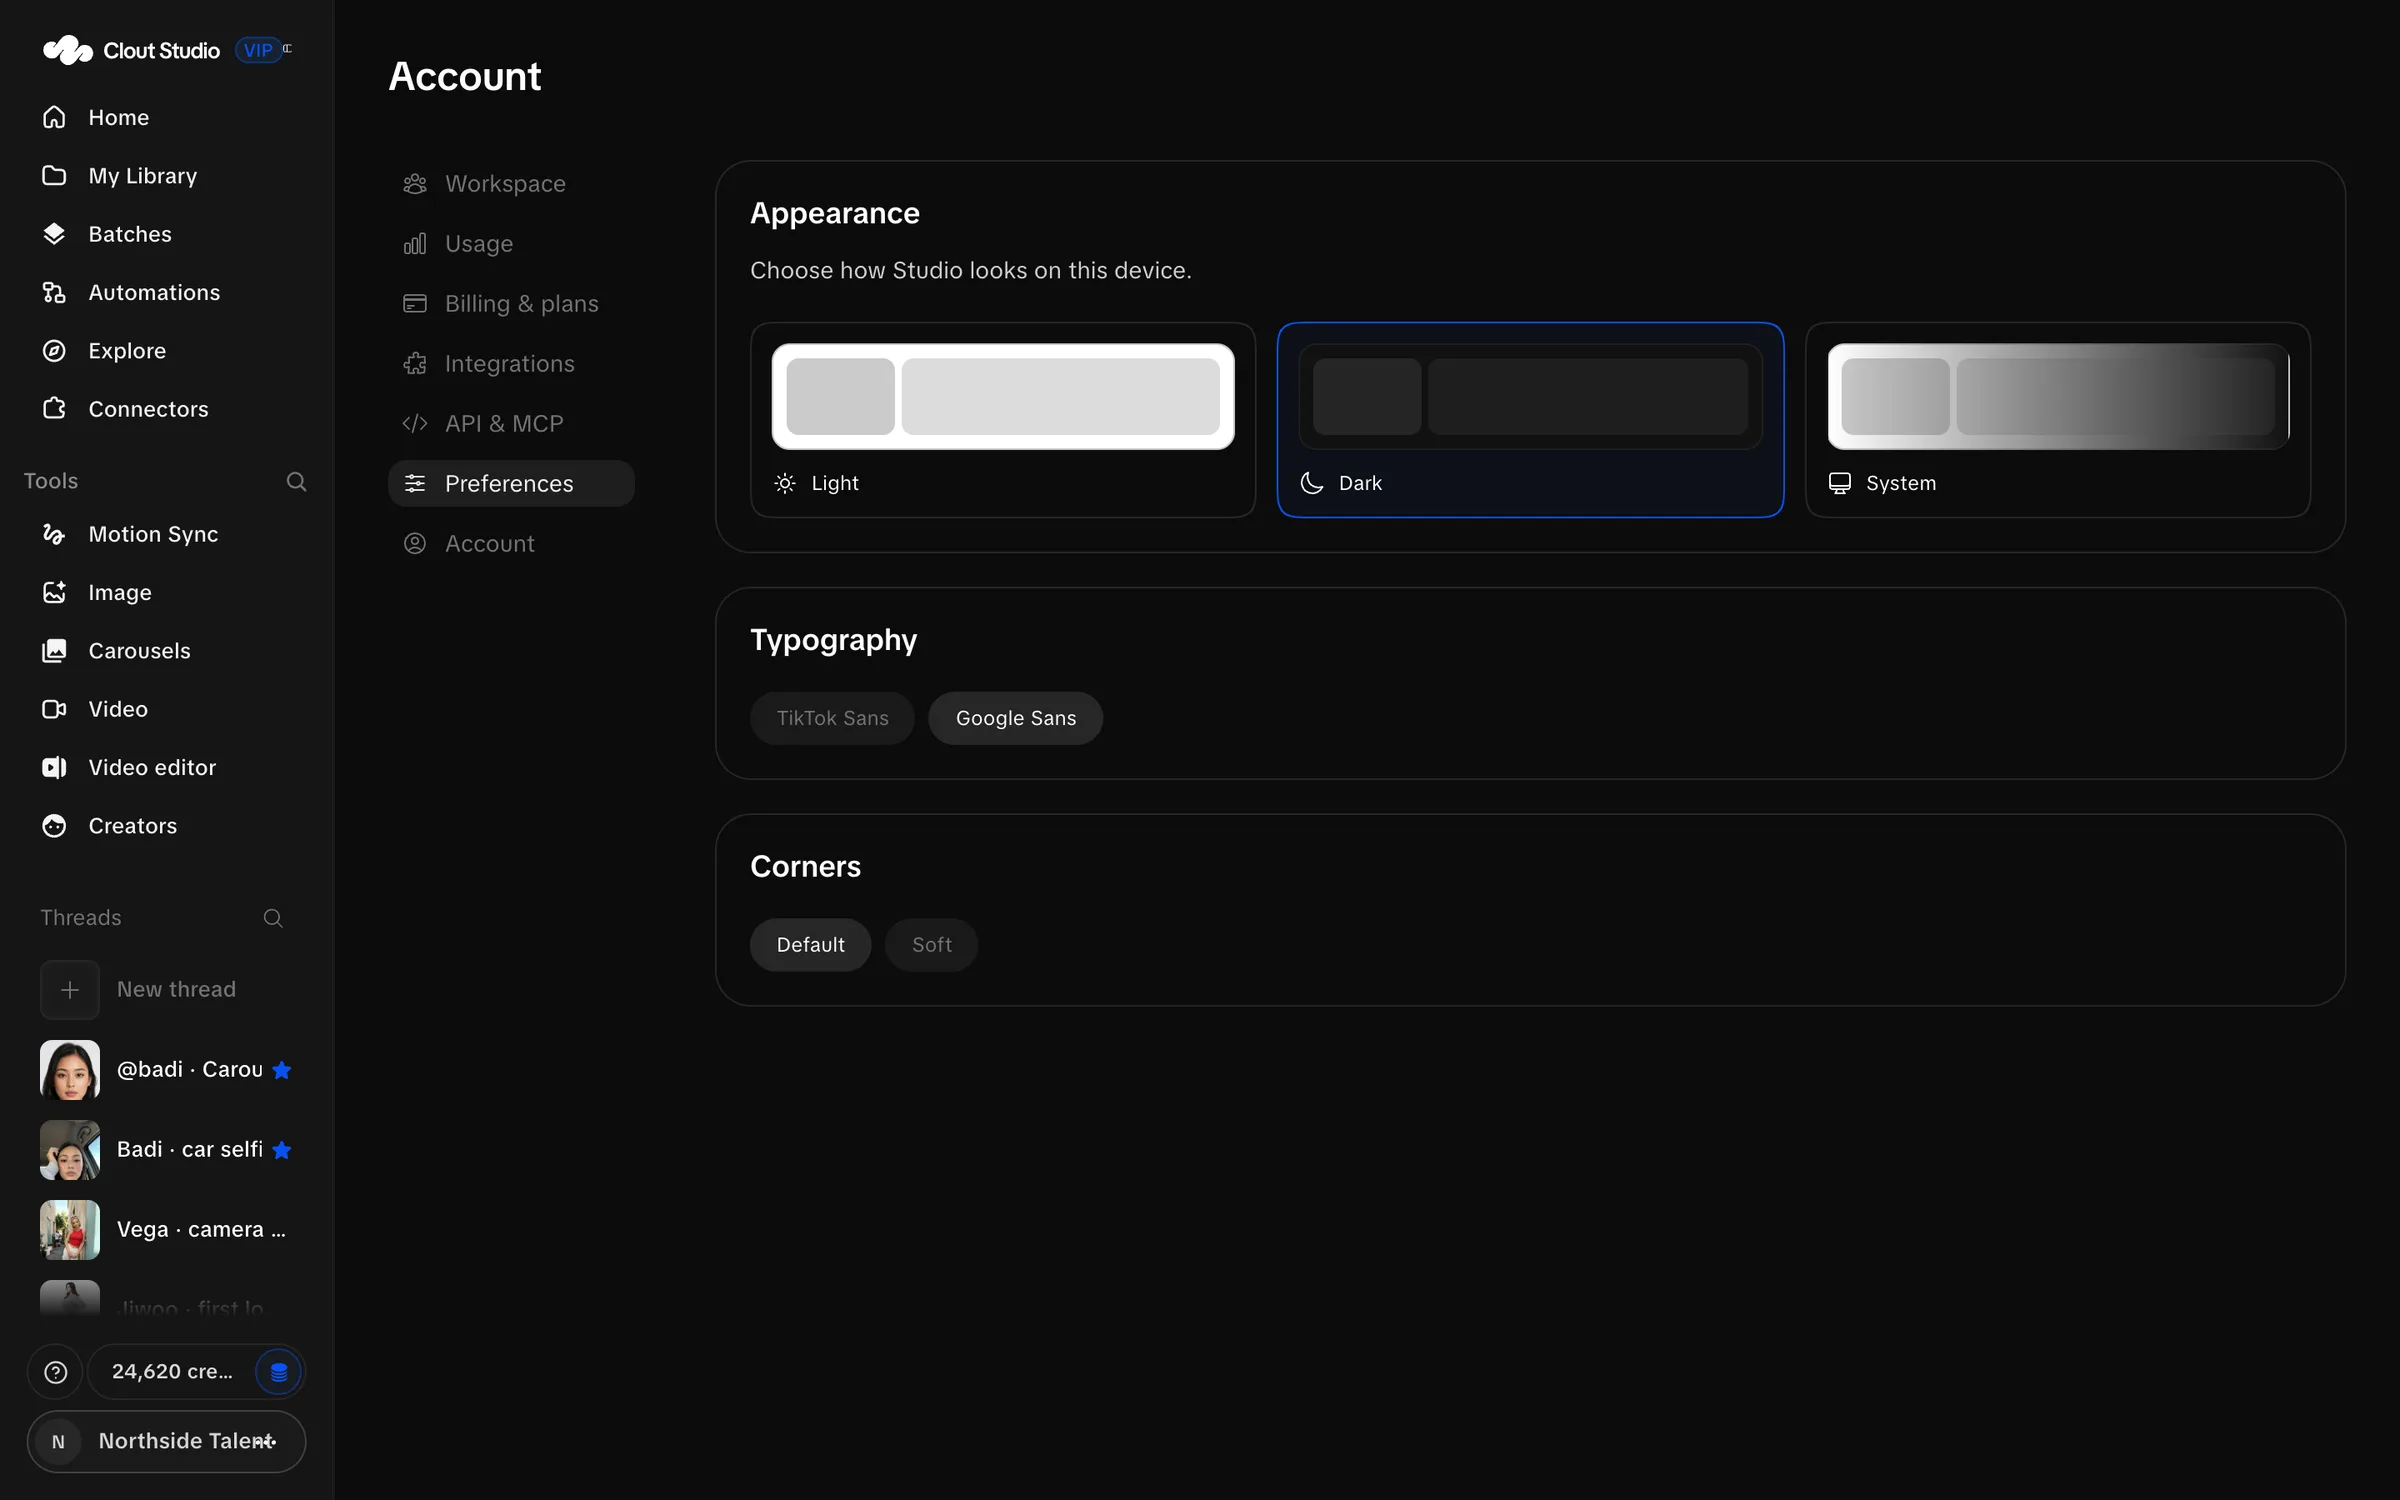
Sign out ends your current Studio sign-in. Reopen Studio and sign in again to return to the workspace.
Return to work
Creation threads keep the conversation and settings around a job. My Library keeps the finished media. A dataset or training run can continue after you leave its page; reopen the Creator to check its progress.
See troubleshooting if an invitation, upload or queued job does not progress. Studio VIP is priced on request. Talk to us about access, credits and your agency’s requirements.